Essential Tips for Creating the Best Wedding Invitations for Your Big Day
Are you getting married soon and want to make your own wedding invitations? Congratulations! Though planning each and every detail of your wedding can be overwhelming, we’re here to help you out.
Your invitations are one of the first tasks to tackle on your wedding to-do list. They will give your guests a sneak peek into your wedding theme, so they know what to expect.
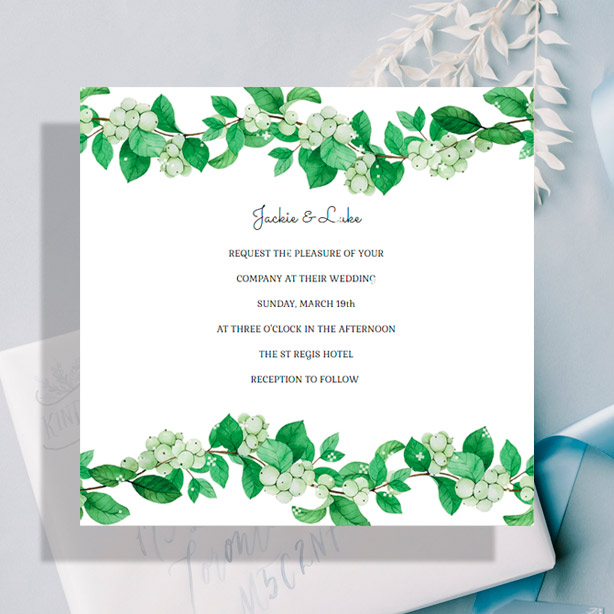
Whether you go for simple yet elegant, or floral and playful, this important piece of paper should reflect your personal taste. The invitations should also contain important details about the venue, the ceremony time, and RSVP information.
Ready to create the best wedding invitations for your big day? Keep reading to learn the step-by-step process.
Decide on the Style

The first and most important decision to make is on the invitation style. Typically, wedding invitations can be traditional, vintage, modern, elegant, or minimalistic.
The style you choose for the invitations should be the same as for your wedding. For example, if your wedding is elegant and luxurious, you’ll choose formal wedding invitations. For boho-chic, outdoor weddings, floral or vintage invitations are the best choice.
Some brides like to get creative and add photos or hand-drawn art into their invitations. If you want to insert a photo of you and your fiance(e), be careful with the placement, and remember that you’ll need to add text later on.
Choose a Color Theme
The next step in creating your wedding invitations is choosing a color theme. You can use your wedding theme color palette or go with colorful wedding invitations. Choose a maximum of two complementing colors, but make sure the text is easy to read.
You can also choose the colors according to the season. For a spring wedding, colorful florals on a white background is a perfect choice. For a winter wedding, choose a dark background with white or cream letters. Fall invitations can have deep green, yellow, brown, or red hues, and for summer weddings, go with a bright yellow, blue, green, or pink.
Choose a Typography Style
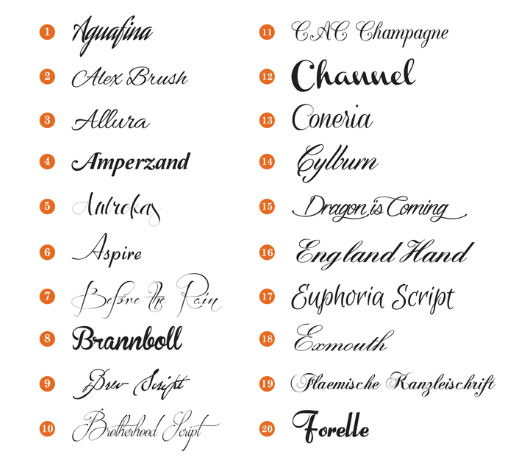
The invitation style and colors go hand in hand with the typography. Every element should match and complement each other. If you’re using font combinations, stick to no more than two fonts. You can later use the same fonts for the envelopes, your wedding menu, and thank you notes.
Some of the most elegant font choices for wedding invitations are:
- Coneria Script
- Baroque Script
- Freebooter Script
- Respective
- Great Vibes
- Bromello
- Aphrodite
- Alex Brush
- Windsong
- Honeymoon
These scripted and calligraphy styles go great with classic sans serif fonts like Montserrat, Josefina, Hammersmith One, Lato, and Roboto.
Use an Ampersand (&) Instead of “And”
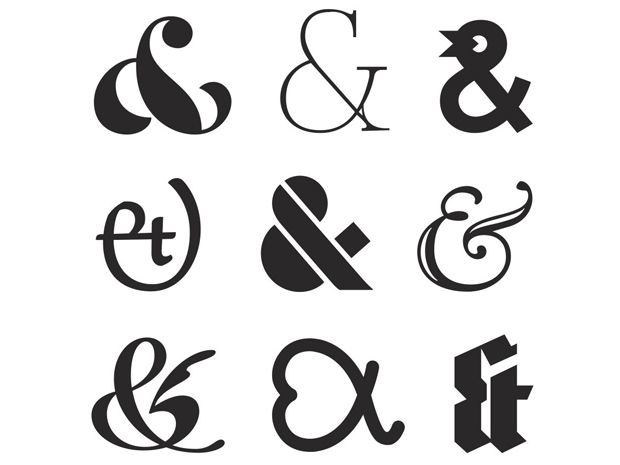
The ampersand symbol (&) should go between the names of the couple in place of “and”. This is not only more elegant but also saves space on the invitation. You can use the ampersand from your default font, but if you don’t like it, you can always find a beautiful ampersand from other fonts.
Make sure the ampersand is in a similar style to the font you use for your names. If you implement it well into the text, it won’t be distracting or too distinctive from the rest of the writing.
Some fonts with stunning ampersands are Eloquent JF Pro, Caslon No. 337, Hera Big, Carmen Fiesta, Miller Display Italic, Tom’s Roman, and My Darling.
Write the Text
The text is the most important part of the invitation. This is where you should inform your guests about the ceremony time and location, and include RSVP details, and dress code (if applicable). Don’t include directions to the venue, wedding registry details, post-wedding activities, or where you’re registered.
It’s tempting to put a lot of information to fill in space, but this can make the invitation too busy and illegible. Try to keep the wording clear and elegant, so your guests aren’t confused by too many details.
If you want to share more information with your guests, add your wedding website on the back of the invitation. If you’re sending out the invitations online, you can add clickable links to important information and maps in the body of the email.
Double-Check Everything
Once you finish designing the invitations, it’s time to double-check and proofread everything. First, read the text to catch any typos or grammatical errors. You can ask for opinions from your family and friends, or ask a professional editor to help you out.
Then, read the text out loud to see how it flows. If you think you can simplify it, do that now. Next, check if the text is aligned centrally and that all margins are the same. This is extremely important because you want the eye to focus on the text in the middle.
Finally, check if there’s enough spacing between the lines of text. You don’t want them to be too close together, especially around the couple’s names. You can follow our wedding invite scripts to make sure your invitations are ready to go.
Send Them to Guests
Once you double-check the invitations, it’s time to send them out to the guests. The easiest, most affordable and environmentally friendly option is to send them online via email. You can also add important links for your guests such as your wedding website and gift registry, and receive RSVPs online.
This process will save you time and money, and you can track everything from one place. You don’t need to look for printing companies, wait for the invitations to arrive for approval, and send them to everyone via regular mail.
Use These Tips to Make the Best Wedding Invitations for Your Special Day!
The best wedding invitations are made with love and attention to detail, and these tips will help you create the invitation of your dreams.
From choosing a style, color theme, and typography to writing the text, you can make your own wedding invitations in just a few steps.
Need more design inspiration? Take a look at our selection of online invitations that you can easily customize to suit your aesthetics.


